
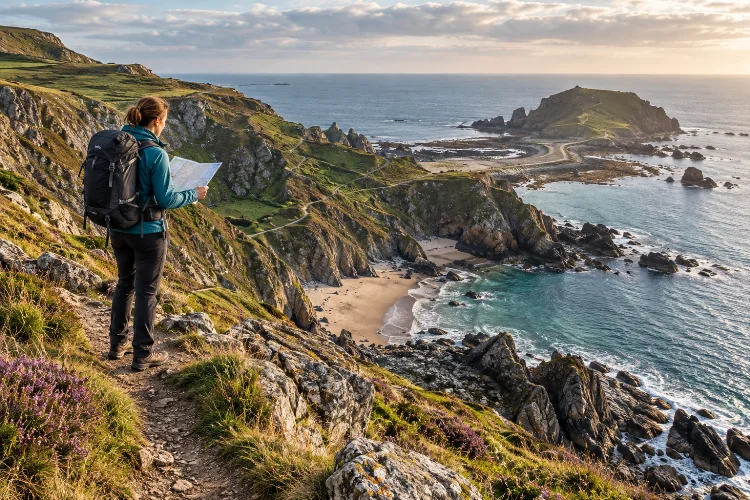
Coastal routes can be some of the most spectacular places to explore, but they are also among the most dynamic. A trail that looks simple on a map may combine unstable cliffs, narrow beaches, steep headlands, tide-restricted sections, slippery rocks, and exposed paths within only a few kilometers.
That complexity is why advanced route planning for cliffs, beaches and coastal trails requires more than measuring distance.
You need to think about when a beach is accessible, where a cliff path may be vulnerable to erosion, how weather affects visibility, and whether rising water could block the route behind you.
The National Park Service advises coastal hikers to watch for slippery terrain, fragile cliff faces, tidal behavior, and changing conditions when traveling near the ocean.
The best coastal itineraries are therefore flexible. Instead of assuming the route will behave exactly as expected, good planning gives you alternative paths, extra time, and clear reasons to turn around when conditions become less predictable.
1. Break the Route Into Different Terrain Zones
A coastal trail is rarely just one type of terrain.
You may begin on a firm cliff-top path, descend onto soft sand, cross loose cobbles, climb a rocky headland, and then return to a narrow trail above the sea. Each surface changes your pace and risk level.
Instead of calculating the route as one total distance, divide it into sections based on terrain. Estimate travel time seperately for beaches, cliff paths, rocky crossings, steep climbs, and exposed sections.
This creates a much more realistic schedule.
For example, three kilometers of firm coastal trail may be comfortable, while three kilometers of wet boulders or deep sand can take far longer. NPS coastal guidance also notes that uneven terrain, erosion, waves, and steep steps can affect conditions even on established trails.
Treating each section differently helps prevent an itinerary from becoming too aggressive.
2. Plan Beach Sections Around the Tide
Beaches are unusual hiking corridors because their width changes throughout the day.
A broad stretch of sand at low tide can narrow dramatically as water rises. In some places, cliffs or headlands leave no safe route once the sea reaches the base of the rock.
NOAA recommends checking local tidal charts before coastal activities because predicted water levels can help travelers understand when shoreline access is likely to expand or contract.
Mark tide-sensitive sections before departure and work backwards from the safest crossing times.
If a headland is easiest to pass near low tide, calculate how long it will take to reach that point using a conservative walking speed. Avoid scheduling your arrival exactly at the lowest tide, because delays can happen.
A safer plan gives you enough margin to turn back or reach higher ground if the section takes longer than expected.
3. Treat Cliff Edges as Moving Hazards
Cliffs may look permanent, but coastal bluffs are constantly affected by rain, wind, waves, and erosion.
Point Reyes National Seashore warns that coastal bluffs can be unstable and prone to crumbling or sliding, particularly after wet weather. Some cracks can form several feet back from the visible edge, which means standing just behind the cliff line is not always safe.
Stay on established trails wherever possible and respect barriers or closure signs.
Do not assume a viewpoint is safe because previous visitors have created an informal path toward it. NPS guidance notes that unofficial routes can worsen erosion and may lead directly into hazardous areas near unstable cliffs.
During preperation, check whether recent storms, landslides, or erosion have affected the route. Coastal trails can change faster than inland paths.
4. Use Surf Conditions as Part of Route Planning
You do not need to enter the ocean for waves to become a hiking hazard.
High surf, sneaker waves, and long-period swell can reach much farther up a beach than normal waves. NOAA specifically warns that sneaker waves can surge unexpectedly after quieter periods and may sweep people or heavy debris into the water.
This matters when a route passes along narrow beaches or around rocky platforms.
Before committing to those sections, check local surf forecasts and observe the water. NOAA recommends watching wave behavior from a safe area before moving close to the ocean on exposed coastlines.
Never build your schedule around the assumption that the waterline will remain where it is when you arrive.
If larger waves begin reaching the upper beach, switch to a higher route or wait rather than pushing through a narrowing corridor.
5. Identify Safe Cliff-to-Beach Transition Points
Moving between cliff trails and beaches often creates some of the most difficult parts of a route.
Access paths can be steep, eroded, muddy, or poorly marked. A descent that looks manageable from above may become unpleasant when carrying a pack.
Mark official access points on your map before departure.
These locations can also serve as emergency exits if the beach becomes unsafe. Knowing that another established trail climbs away from the shore two kilometers ahead gives you far more flexibility than simply following the beach until conditions become difficult.
Avoid creating shortcuts down steep slopes.
Unplanned descents can damage vegetation, accelerate erosion, and place hikers on unstable ground. NPS coastal trail guidance consistently recommends remaining on established routes, particularly near fragile cliffs.
A slightly longer official path is usually much safer than a direct-looking scramble.
6. Account for Fog, Wind, and Rapid Weather Changes
Coastal weather can change quickly.
A sunny morning may become windy, cold, or foggy within a short period, especially near exposed headlands. Golden Gate National Recreation Area warns that coastal conditions can shift rapidly from sunshine to wind, fog, and cold.
Fog affects more than comfort. It can remove visual landmarks, reduce your ability to see waves approaching, and make navigation along similar-looking beaches more difficult.
Strong wind can also increase fatigue and make exposed cliff sections more uncomfortable.
Build weather checkpoints into longer routes. If visibility becomes poor before reaching a difficult headland, reconsider whether continuing is necessary.
Carry offline navigation and enough clothing for conditions that are worse than the forecast suggests. Coastal microclimates do not always match nearby inland weather.
7. Add Bailout Routes Before Entering Difficult Sections
Every demanding coastal section should have an answer to the question: “What happens if we cannot continue?”
A bailout option might be an inland trail, staircase, road access point, protected cove, campsite, or route back to higher ground.
The National Park Service recommends learning escape routes and emergency options in areas exposed to geological hazards. It also emphasizes staying back from cliff edges and reducing time spent in dangerous zones.
Mark bailout points directly on your offline map.
Also identify stretches where there are no easy exits. Those sections deserve the largest safety margins because once you begin, your options may become limited.
If weather, surf, fatigue, or tide conditions look marginal before entering a no-exit section, waiting or turning back may be the smarter choice.
8. Keep a Safe Distance From the Waterline
People often walk close to the surf because wet sand is firmer and easier underfoot.
That convenience can increase exposure to sudden waves.
The National Weather Service warns that dangerous waves, rip currents, and other surf hazards can exist even during pleasant weather.
Where possible, travel high enough on the beach that an unexpectedly large wave does not immediately reach you.
Pay attention to wet sand, seaweed, debris, and logs near the upper shore. These can indicate how far recent waves have travelled.
On some exposed coastlines, heavy driftwood is especially dangerous because waves can lift and roll logs that appear completely stable. NOAA notes that even relatively small amounts of moving water can shift large pieces of beach debris.
Never use driftwood as a barrier between yourself and incoming surf.
9. Plan Conservatively Around Headlands
Headlands are natural bottlenecks.
A beach may appear continuous from a distance, but a rocky point can interrupt travel or force a steep inland detour.
Study satellite imagery, topographic maps, official trail descriptions, and tide information before assuming a headland is passable.
If the route goes around the seaward side, determine what water level and surf conditions are required. If it goes over the top, check the elevation gain and trail condition.
Build extra time into both options.
One of the most common planning problems is assuming that a short headland will only take a few minutes. In reality, route-finding, slippery rock, waves, or steep trail sections can slow progress considerably.
Treat every headland as its own mini-route rather than just another point on the map.
10. Use Timing Windows Instead of Fixed Schedules
Coastal travel works better with windows than exact deadlines.
Instead of saying, “We must reach the next beach at 2:00 p.m.,” think in terms of acceptable conditions. Perhaps the crossing should happen between late morning and early afternoon, before the tide rises and while visibility remains good.
This approach makes the plan easier to adjust.
If you are moving faster than expected, you can rest before the next technical section. If you are slower, you can choose an alternate route before the situation becomes stressful.
Flexible timing also prevents people from rushing around cliff edges or slippery rocks simply because they feel behind schedule.
Check progress occassionally, but prioritize conditions over the original timetable.
A successful coastal route is one completed safely, not one completed exactly according to the first plan.
11. Respect Closures and Changing Trail Conditions
Coastal trails are particularly vulnerable to storms and erosion.
Sections can collapse, disappear, or be temporarily closed after heavy rainfall or high surf. Point Reyes has documented cliff failures that removed parts of established trail entirely.
Check official alerts before departure rather than relying only on older guidebooks or user-generated maps.
If a trail is closed, do not assume there is a safe route around the closure.
Social trails may lead onto unstable cliffs, through sensitive vegetation, or toward areas that are difficult for rescuers to reach. NPS guidance warns that informal paths can increase both environmental damage and injury risk.
Coastal landscapes are constantly changing, so yesterday’s route may not always be today’s safest option.
Advanced coastal route planning is about understanding how terrain, tides, cliffs, waves, weather, and access points interact. A route that looks short on a map may become complicated once erosion, rising water, slippery rock, or limited escape options are added.
Effective advanced route planning for cliffs, beaches and coastal trails starts with dividing the journey into terrain zones, checking tides and surf forecasts, identifying stable access points, and marking bailout routes before they are needed.
Before your next coastal hike, research current trail conditions and give yourself generous time margins. Stay well back from unstable cliffs, respect the ocean, and change your itinerary when conditions deteriorate.
Coastal landscapes are dynamic by nature, and the safest route is usually the one flexible enough to change with them.