
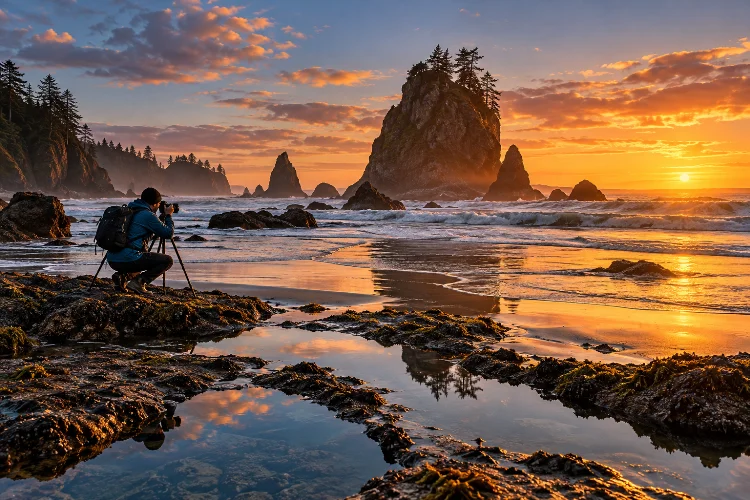
Coastal photography rarely rewards photographers who simply arrive at a beautiful beach and hope for the best. The shoreline is constantly changing, and two factors influence the scene more than almost anything else: light and tides.
A location filled with reflective pools at sunrise might be completely underwater six hours later. A dramatic sea stack surrounded by water at high tide may become connected to the beach when the ocean retreats.
Even the same composition can feel completely different under soft dawn light, harsh midday sun, or warm evening conditions. This is why advanced coastal photography planning around light and tides involves thinking several steps ahead.
Instead of planning only where to shoot, experienced photographers consider when the sun reaches the right angle, what the water level will be, how waves will interact with foreground elements, and whether the location remains safely accessible.
NOAA notes that tides produce predictable changes in coastal water levels, while local weather can cause actual conditions to differ from astronomical predictions.
Combining both variables can turn an ordinary shoreline visit into a carefully timed photographic opportunity.
1. Start With the Relationship Between Light and Water
Light behaves differently around water than it does in many inland landscapes.
Wet rocks can reflect color, shallow pools can mirror the sky, and moving waves can catch highlights that help create texture. At the same time, bright reflections can produce extreme contrast between the ocean and darker cliffs.
The first planning question should therefore be: where will the light come from?
Side lighting can emphasize rock textures and cliff shapes. Backlighting can make breaking waves glow, while front lighting may produce cleaner colors and more evenly illuminated landscapes.
Do not assume sunrise or sunset is automatically the best option. The orientation of the coastline matters. A west-facing beach may work beautifully at sunset, while an east-facing bay might offer stronger compositions around sunrise.
Use maps and sun-position tools during scouting so you understand how the light will interact with the shoreline before arriving.
2. Use Golden Hour for Shape, Texture, and Depth
Golden hour is popular for a reason.
When the sun sits lower in the sky, its light travels across the landscape at a shallow angle. That can create long shadows, warmer tones, and stronger separation between rocks, cliffs, dunes, and other coastal features.
Low-angle light is especially useful when photographing textured foregrounds.
Ripples in sand, erosion patterns, exposed rocks, and small pools often look more dimensional when illuminated from the side. At midday, those same surfaces can appear relatively flat.
However, golden hour should be planned together with the tide.
A perfect sunrise means little if the foreground you hoped to photograph is submerged. Conversely, a low tide that exposes beautiful formations may occur well after the strongest morning light has disappeared.
The goal is to identify dates when useful tidal conditions and attractive light occur reasonably close together.
3. Treat Blue Hour as a Separate Creative Window
Many photographers pack up immediately after sunset, but coastal scenes can remain visually interesting during blue hour.
The cooler light after sunset or before sunrise often creates a softer relationship between the sky and ocean. Artificial lights from distant harbors, piers, or coastal settlements may also become more visible without completely dominating the landscape.
Longer exposures become easier as natural light falls.
This can help smooth wave movement, simplify busy water, and produce a more atmospheric relationship between stationary rocks and moving surf.
But darkness adds practical complications. Wet rocks that are obvious during daylight may become difficult to see, while rising tides can quietly remove your exit route.
If shooting into blue hour, scout the area beforehand and know exactly where safe access lies. Avoid exploring unfamiliar tidal platforms for the first time after dark.
4. Match Low Tide to Foreground-Rich Compositions
Low tide can transform a relatively simple coast into a foreground playground.
Rock pools, channels, reefs, wet sand, and exposed formations become available as the ocean retreats. Olympic National Park notes that tide pools become most accessible around lower tides, with particularly low tides revealing areas that normally remain underwater.
For photographers, these temporary features can create leading lines, reflections, repeating patterns, and strong foreground anchors.
A shallow tide pool, for example, might reflect a sea stack or colorful sky. Wet sand can produce a cleaner mirrored surface than dry sand, especially shortly after a wave retreats.
Arrive before the lowest predicted tide rather than at the exact minimum. This gives you time to explore compositions while the water is still changing.
It also allows you to observe which surfaces are slippery and which areas become isolated as the tide begins returning.
5. Use High Tide for Minimalist and Dynamic Images
Low tide offers detail, but high tide can simplify the coast.
Rocks that clutter a foreground may disappear underwater, leaving isolated sea stacks, cliffs, or headlands surrounded by cleaner areas of water. This can create stronger minimalist compositions.
Higher water can also bring wave action closer to coastal structures.
With the right shutter speed, photographers can capture crashing surf sharply or use longer exposures to turn moving water into softer streaks and mist-like textures.
The important word is distance.
Do not move closer simply because dramatic waves make a better image. The National Weather Service warns that coastal environments can contain dangerous waves and currents even when conditions initially look pleasant.
Compose from a position where an unexpectedly large wave does not immediately become an emergency.
6. Read Tide Height, Not Just High and Low Times
A common mistake is checking only when low tide occurs.
Tide height can be just as important.
NOAA’s tide prediction service provides both predicted times and water heights at thousands of coastal stations. That makes it possible to compare one day’s low tide with another rather than assuming all lows expose the same amount of shoreline.
For photography, this matters because a difference in water level can completely change a composition.
One low tide might expose a rock shelf, while another leaves it partly underwater. A slightly higher tide might be better if you want waves flowing through channels rather than an entirely dry foreground.
Keep notes after successful shoots.
Recording the approximate tide height alongside the composition makes it easier to reproduce similar conditions later.
7. Remember That Predictions Are Not Exact Water-Level Guarantees
Tide tables are extremely useful, but the ocean does not follow them with photographic precision.
NOAA explains that astronomical tide predictions do not include every short-term effect of wind, rainfall, atmospheric conditions, or freshwater runoff. These factors can cause actual water levels to differ from predictions.
That means you should always observe what the ocean is actually doing.
Strong onshore wind, large swell, or stormy conditions can push water farther inland than expected. A rock platform that appears accessible according to the tide table may still be unsafe.
Treat predicted tide height as planning information rather than permission to enter a particular location.
Your camera settings can be adjusted. Your route should not depend on the ocean behaving perfectly.
8. Scout Compositions at a Different Tide
One useful advanced technique is scouting the location under conditions different from those planned for the final shoot.
Visit during daylight and study where channels, rocks, tide pools, and safe pathways appear. Then compare those features with the water level you expect during the actual photography session.
This helps you predict which elements will remain visible.
A channel that looks empty during low tide might become ideal for photographing flowing water as the tide rises. Likewise, a rock that seems uninteresting when dry could become a strong focal point once surrounded by moving surf.
Photograph potential compositions on your phone during scouting and make simple notes about direction and water level.
This is more reliable than trying to rediscover everything in dim morning light while the tide is already changing.
9. Plan Shutter Speed Around Wave Behavior
Coastal photography becomes much more intentional when shutter speed reflects the character of the sea.
Fast shutter speeds can freeze individual droplets and breaking waves, emphasizing power and texture. Moderately slow exposures can create streaks as water flows between rocks, while longer exposures may simplify the ocean into a smoother surface.
There is no single correct setting.
Instead, observe the rhythm of incoming and receding water. Sometimes the strongest image happens just after a wave begins pulling back, creating lines that lead from the foreground toward the horizon.
Use a tripod when appropriate, but position it carefully.
Incoming waves can shift legs placed in loose sand, while salt spray can quickly cover filters and lenses. Keep basic cleaning materials easily accesible rather than buried at the bottom of the bag.
10. Build Safety Into the Composition Plan
A technically perfect composition is not worth becoming trapped by the tide.
Olympic National Park advises coastal visitors to carry tide information, monitor time carefully, and recognize that some areas become inaccessible as the tide rises. Strong wind and storms can also raise water levels beyond normal expectations.
Identify your exit route before setting up.
If you cross around a headland, onto a rock shelf, or through a narrow beach section, determine whether the same path will remain available thirty minutes later.
Tide-pool areas deserve extra caution because algae and seaweed can make rocks extremely slippery. The NPS also advises watching for returning tides and unexpected waves.
Photography encourages people to concentrate intensely on the viewfinder. Look away from the camera occassionally and reassess what the ocean is doing around you.
11. Protect Equipment Without Losing Mobility
Saltwater environments are rough on cameras.
Fine spray settles on lenses, filters, tripod legs, buttons, and bag hardware. Sand can enter moving parts, while condensation becomes an issue when equipment moves between different temperatures.
Carry only what you realistically need.
A smaller kit can make it easier to move quickly when conditions change. One wide-angle lens and one short telephoto may accomodate most coastal landscape situations without requiring constant lens changes in blowing sand or spray.
Keep spare batteries and memory cards protected inside sealed storage, and wipe down equipment after the session.
If a wave reaches your position, personal safety comes before saving the tripod placement. Equipment can be replaced; the photographer cannot.
12. Plan Several Possible Images Instead of One
The strongest coastal photography plans are flexible.
You might arrive expecting reflections at low tide but discover strong winds breaking the surface. Instead of forcing the original idea, switch to photographing wave movement or textured rocks.
Cloud cover may block a colorful sunset while producing excellent soft light for cliffs.
Similarly, a higher-than-expected tide might eliminate your preferred foreground but create more dramatic water around offshore rocks.
Create two or three possible visual concepts before arriving: one for calm water, one for stronger surf, and one for less dramatic light.
That approach makes you more responsive to the enviroment rather than disappointed when reality differs from the forecast.
Successful coastal photography depends on more than owning the right camera or reaching a spectacular location. Light and water continuously reshape what the photographer sees, sometimes changing an entire composition within minutes.
Effective advanced coastal photography planning around light and tides combines sun direction, golden and blue hour, tidal height, wave movement, foreground availability, weather, and safe access.
Before your next coastal shoot, study tide predictions alongside sunrise or sunset timing, scout the shoreline during daylight, and identify safe exit routes. Arrive early enough to watch the landscape evolve instead of chasing one brief moment.
When you plan around both the sky and the ocean, coastal photography becomes less about luck and much more about anticipating when the elements will work together.