
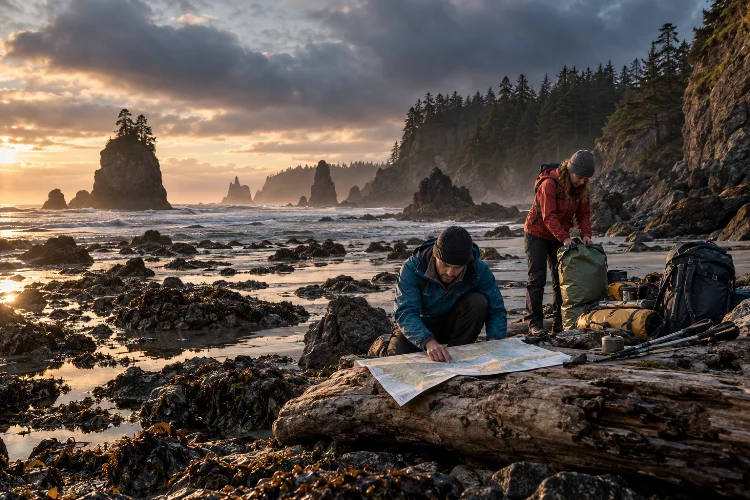
Remote coastlines can look deceptively simple. On a map, the route may appear to be nothing more than following the edge of the ocean for a few days.
In reality, coastal wilderness travel combines several moving hazards at once: tides, waves, slippery rock, cliffs, river mouths, unstable logs, changing weather, and limited escape routes.
That combination makes advanced coastal travel planning for remote natural shorelines very different from ordinary hiking. Distance matters, but timing often matters even more.
A headland that is easy to cross at low tide may become completely impassable a few hours later, while a normally quiet beach can change dramatically when an offshore storm creates larger swell.
Olympic National Park warns that rising tides can trap hikers below cliffs and that some coastal headlands can never be safely rounded from the beach, even at the lowest tides.
Good coastal planning therefore treats the ocean, terrain, and weather as one connected system rather than separate problems.
1. Build the Route Around Tides, Not Just Distance
The first rule of serious coastal route planning is simple: the shoreline is not permanently available.
Sections of beach, rocky platforms, caves, and headlands may only be passable during particular tidal windows. If you arrive too late, your route could disappear underwater.
Before departure, identify every tidal restriction along the route. Then compare those locations with predicted high and low tides for the exact dates of travel.
NOAA provides official tide predictions for thousands of coastal locations, including predicted times and water heights. These predictions are widely used for navigation and coastal recreation.
Do not schedule your arrival exactly at the limit of a safe tidal window. Build margin into the plan so slower walking, navigation mistakes, or unexpected terrain do not force you to race an incoming tide.
Olympic National Park recommends carrying both a tide chart and a topographic map with tidal restrictions clearly marked.
2. Understand Why Tide Predictions Are Not the Whole Story
A tide table is essential, but it does not describe every condition affecting water level.
NOAA explains that astronomical tide predictions do not account for short-term influences such as wind, rainfall, freshwater runoff, and other meteorological effects.
That distinction matters on exposed shorelines.
Strong onshore winds or distant storms can create higher water levels and more aggressive waves than you might expect from the tide prediction alone. A section that looks passable according to the table may become uncomfortable or dangerous when large swell is arriving.
This is why tide information should always be compared with the marine forecast, surf conditions, and recent local reports.
Think of the tide chart as your baseline rather than a guarantee.
3. Study Swell, Waves, and Surf Before Committing
Many hikers pay close attention to rain forecasts but barely look at ocean conditions.
That is a mistake on remote coastlines.
Wave height, swell direction, swell period, wind, and approaching storms can dramatically change conditions along a beach or rocky shore. Large waves can reach far beyond the normal surf line and may move heavy driftwood.
Olympic National Park specifically warns coastal travelers to check marine forecasts because hazardous swells and rolling beach logs can be fatal.
The National Weather Service also emphasizes that apparently pleasant weather does not necessarily mean the water is safe. Dangerous waves and currents can exist even on sunny days.
During your route assessment, identify sections where there is little space between cliffs and surf. Those locations deserve larger safety margins than wide beaches where retreat to higher ground is easy.
4. Read the Shape of the Shoreline Carefully
A remote coast should be treated like complex mountain terrain.
Study topographic maps, satellite imagery where available, marine charts, and official route information. Look for headlands, cliffs, rocky platforms, river mouths, coves, offshore reefs, steep overland trails, and possible escape points.
A headland deserves particular attention because it can become a major bottleneck.
Some coastal routes offer inland trails over these obstacles. Others may have no safe alternative at all.
Olympic’s wilderness coast, for example, contains sections where overland trails are necessary because coastal cliffs make beach-level travel impossible.
Its coastal guidance also notes that surfaces can vary between sand, gravel, cobbles, boulders, slick rocks, driftwood, and steep headland routes.
That means your expected travel speed should change with the terrain.
Five miles of firm sand and five miles of slippery boulders are not equivalent.
5. Plan River Mouth and Stream Crossings Separately
Where rivers meet the sea, two moving water systems interact.
Crossing conditions may vary with rainfall, current strength, tide, channel depth, and recent storms. A shallow stream shown in an older guidebook may become much larger after heavy rain.
Do not assume that every river can be crossed simply because the route appears continuous on a map.
Some rivers are permanent barriers that require inland detours or transportation. Olympic National Park, for example, notes that the Hoh River mouth on one coastal route cannot be forded.
Check each significant water crossing seperately during pre-trip planning.
If safe passage depends on water depth, identify a backup route before arriving. Avoid improvising difficult crossings simply because turning around feels inconvenient.
6. Choose Campsites With the Highest Tide in Mind
A beautiful flat patch of beach can be a terrible campsite.
The safest-looking location during low tide may be underwater hours later. Look for clear signs of the high-water line, storm debris, driftwood deposits, vegetation boundaries, and wave exposure before setting up camp.
National Park Service guidance repeatedly recommends camping above the high tide line on wilderness coast routes.
When possible, identify several potential campsite zones before the trip rather than depending on one exact location.
Consider shelter from wind as well. Open beaches can offer spectacular views but may be much more exposed to rain, spray, wind, and blowing sand than nearby forested campsites.
Environmental impact matters too. Leave No Trace guidance for shore environments recommends using durable surfaces such as sand, rock, or gravel and avoiding sensitive vegetation and camping below the high tide mark.
A good campsite should protect both you and the enviroment.
7. Treat Rip Currents and Cold Water as Serious Hazards
Not every coastal trip involves swimming, but unexpected immersion is still possible.
A wave can knock someone from rocks, a river crossing may become deeper than expected, or a person may attempt to retrieve equipment from the surf.
Rip currents are channelized flows moving away from shore and can carry even strong swimmers offshore. The National Weather Service advises against swimming directly against a rip current; escaping along the shoreline or floating while signaling for help may be safer depending on circumstances.
Cold water creates another layer of danger. Air temperature can feel comfortable while ocean temperatures remain low enough to reduce swimming ability quickly.
Avoid planning any section around the assumption that you can simply swim past an obstacle.
On remote coastlines with no lifeguards and limited rescue access, staying out of hazardous water is usually far safer than depending on swimming ability.
8. Build Escape Routes Into Every Difficult Section
A coastal route can become surprisingly restrictive.
Cliffs may prevent inland movement, incoming tides can block the route behind you, and large surf may eliminate the beach ahead.
Identify places where higher ground can be reached before you need them.
Mark overland headland trails, forest access points, roads, emergency campsites, and locations where waiting through a tidal cycle is possible.
This is especially important when passing between two tidal restrictions. You need to know whether there is enough time to clear both obstacles or whether stopping between them would leave you trapped.
Olympic National Park notes that some tidal restrictions can remain impassable during daylight for several days depending on the tidal cycle.
A flexible itinerary should be able to accomodate that possibility.
Never build a multi-day coastal schedule where missing one tidal window automatically causes a serious logistical problem.
9. Expect Slower Travel Than the Map Suggests
Remote shoreline travel is often physically inefficient.
Soft sand absorbs energy. Rounded cobbles move beneath your feet. Algae-covered rocks become slippery, driftwood forces constant detours, and repeated climbs over headlands add elevation to what looks like a flat coastal route.
Olympic National Park notes that variable coastal surfaces, headland trails, and tidal restrictions can limit even strong hikers to roughly five to ten miles per day on its wilderness coast.
That figure should not be treated as a universal rule, but it illustrates how much slower coastal terrain can be than ordinary trail walking.
Schedule conservative daily distances and reassess your speed occassionally.
The most dangerous pressure often comes from realizing you are behind schedule while approaching a narrowing tidal window.
10. Prepare for Limited Communication and Delayed Rescue
Remote shorelines frequently combine weak mobile coverage with difficult rescue access.
Cliffs, forest, isolated beaches, and long distances from roads can complicate communication and evacuation.
Leave a detailed itinerary with someone outside the expedition. Include planned camps, entry and exit locations, expected check-in times, tidal restrictions, alternative routes, vehicle details, and instructions for what to do if you become overdue.
A satellite communicator or personal locator beacon may provide useful redundancy where cellular service is unreliable, but electronic equipment should never replace good planning.
Carry offline navigation information, tide data, weather information obtained before losing connectivity, and backup power for essential devices.
More importantly, establish clear turnaround rules. If the weather deteriorates, swell becomes larger than expected, or your group misses an important tidal window, changing the route is usually better than forcing the original plan.
11. Minimize Your Impact on Fragile Coastal Environments
Remote shorelines may look rugged, but many coastal ecosystems are surprisingly sensitive.
Dune vegetation, nesting areas, tide pools, coastal forests, and intertidal organisms can be damaged by careless travel.
Leave No Trace recommends researching local regulations, travelling and camping on durable surfaces, minimizing waste, and preparing for environmental hazards before entering natural areas.
Stay on established routes when required and avoid creating shortcuts through vegetated dunes.
Do not disturb tide-pool animals, nesting wildlife, or natural shoreline features. Pack out food packaging and other waste, and check local rules concerning fires, food storage, camping zones, and permits.
Careful planning makes a coastal expedition safer while also ensuring the shoreline remains wild for the people who arrive after you.
Remote coastal travel requires more than following a beach from one point to another. Tides, swell, cliffs, river mouths, slippery terrain, campsite exposure, weather, and limited evacuation options can interact in ways that make apparently easy routes surprisingly complex.
Effective advanced coastal travel planning for remote natural shorelines starts with understanding those connections. Study tide tables and marine forecasts, identify restricted headlands, plan conservative daily distances, mark escape routes, and choose campsites well above dangerous water levels.
Before your next coastal expedition, research the shoreline as carefully as you would research a mountain route. Give yourself generous safety margins and be willing to wait, turn around, or change plans when the ocean does not match your expectations.
On remote coasts, flexibility is one of your most valuable pieces of safety equipment.